How to… Embed a Form in WordPress
 Forms are a vital part of any WordPress website. Luckily, WordPress has a plethora of form plugins that you can use to create any type of form. Gravity Forms is one such plugin and to make things even better, the plugin makes it easy to embed a form in your WordPress website.
In this how-to post, we’ll go over some basic getting started points for creating forms and walk you through the different options for embedding a form in your WordPress website.
Read on to find out more, or watch the video…
Creating a Form With Gravity Forms
Let’s start at the top: before you can embed a form in your WordPress website, you have to create it.
So what kind of forms you can build with our plugin? The short answer: any type of form!
Here are just a few examples:
- Simple and advanced contact forms
- Payment forms for products or services
- Event booking forms
- Content submission forms
- Quizzes and surveys
- Application forms
- and much much more!
Thanks to our template library, you can easily find a form template you need, import it into your website, and then edit it to meet your needs. So let’s take a look at how the process works…
Start With A Form Template
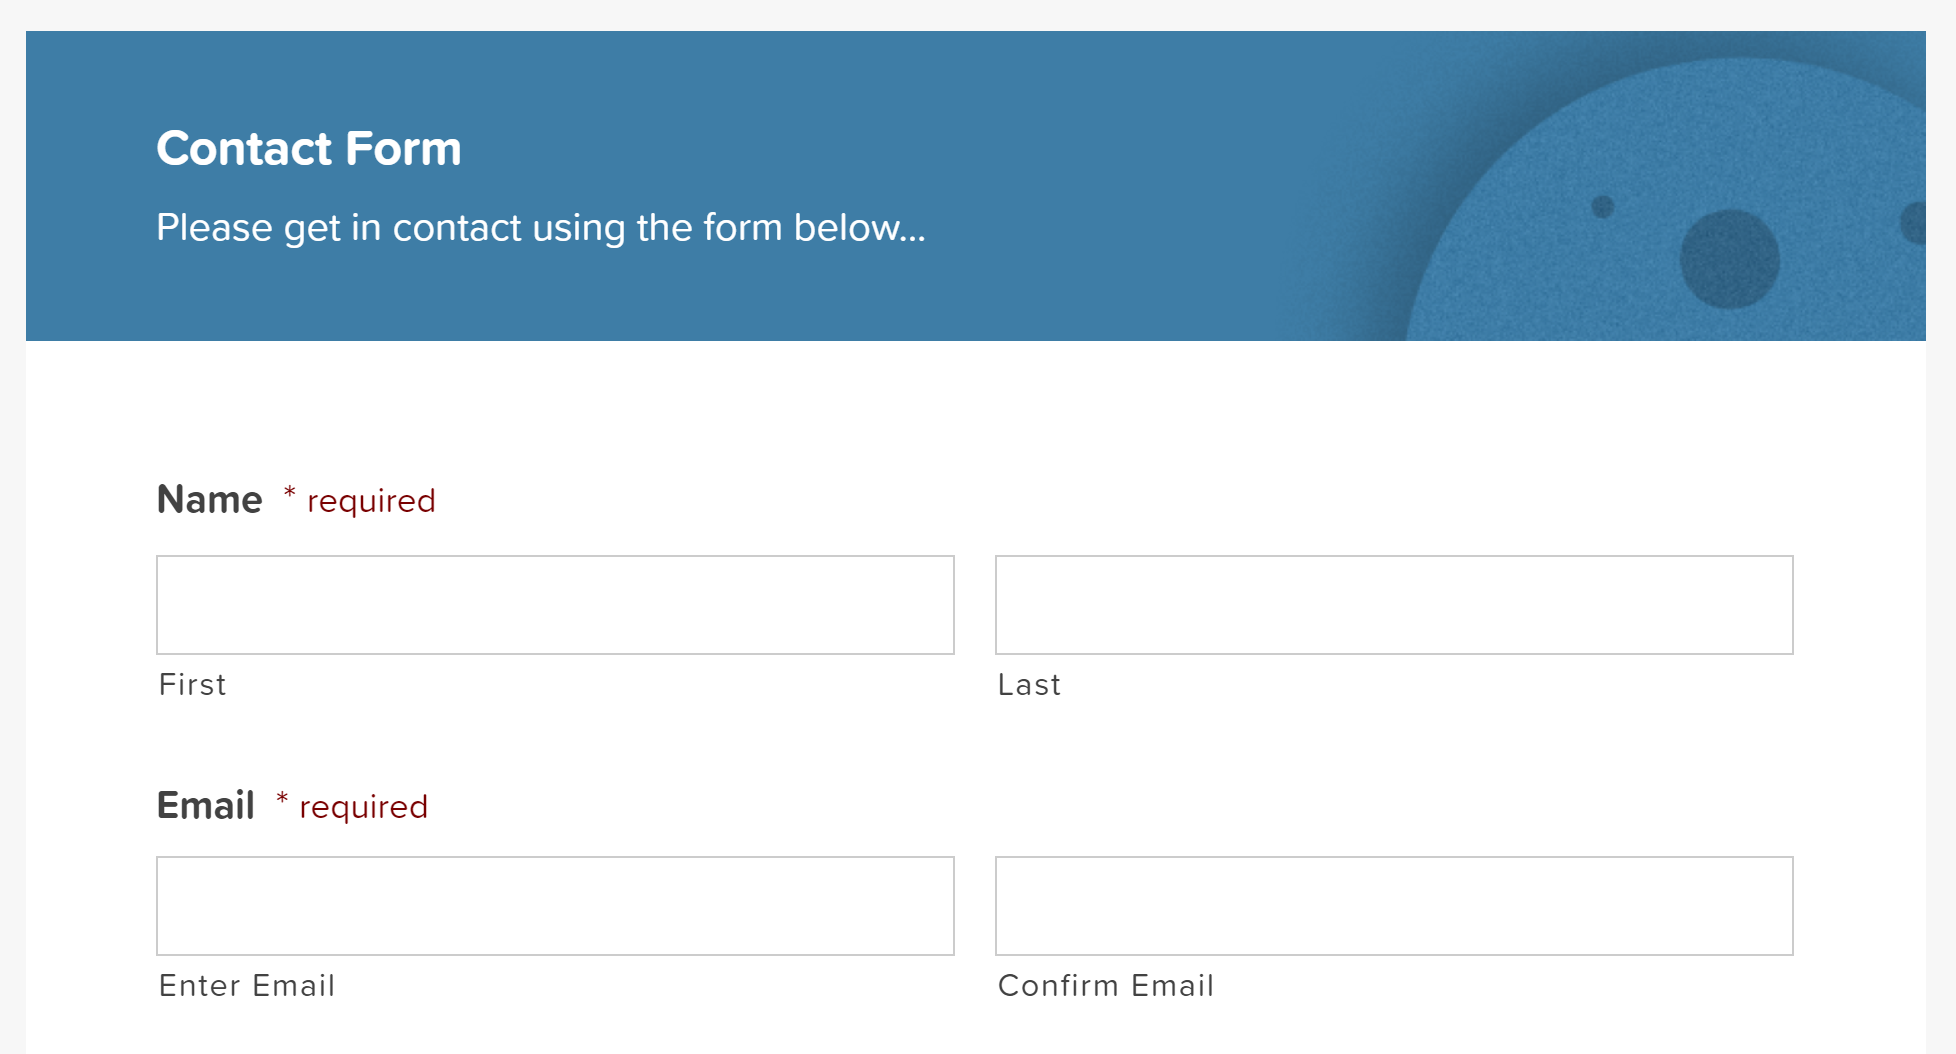
The easiest way to get started with Gravity Forms is to use one of the premade form templates from our template library. Simply choose a form you need and click the Get This Form Template button.
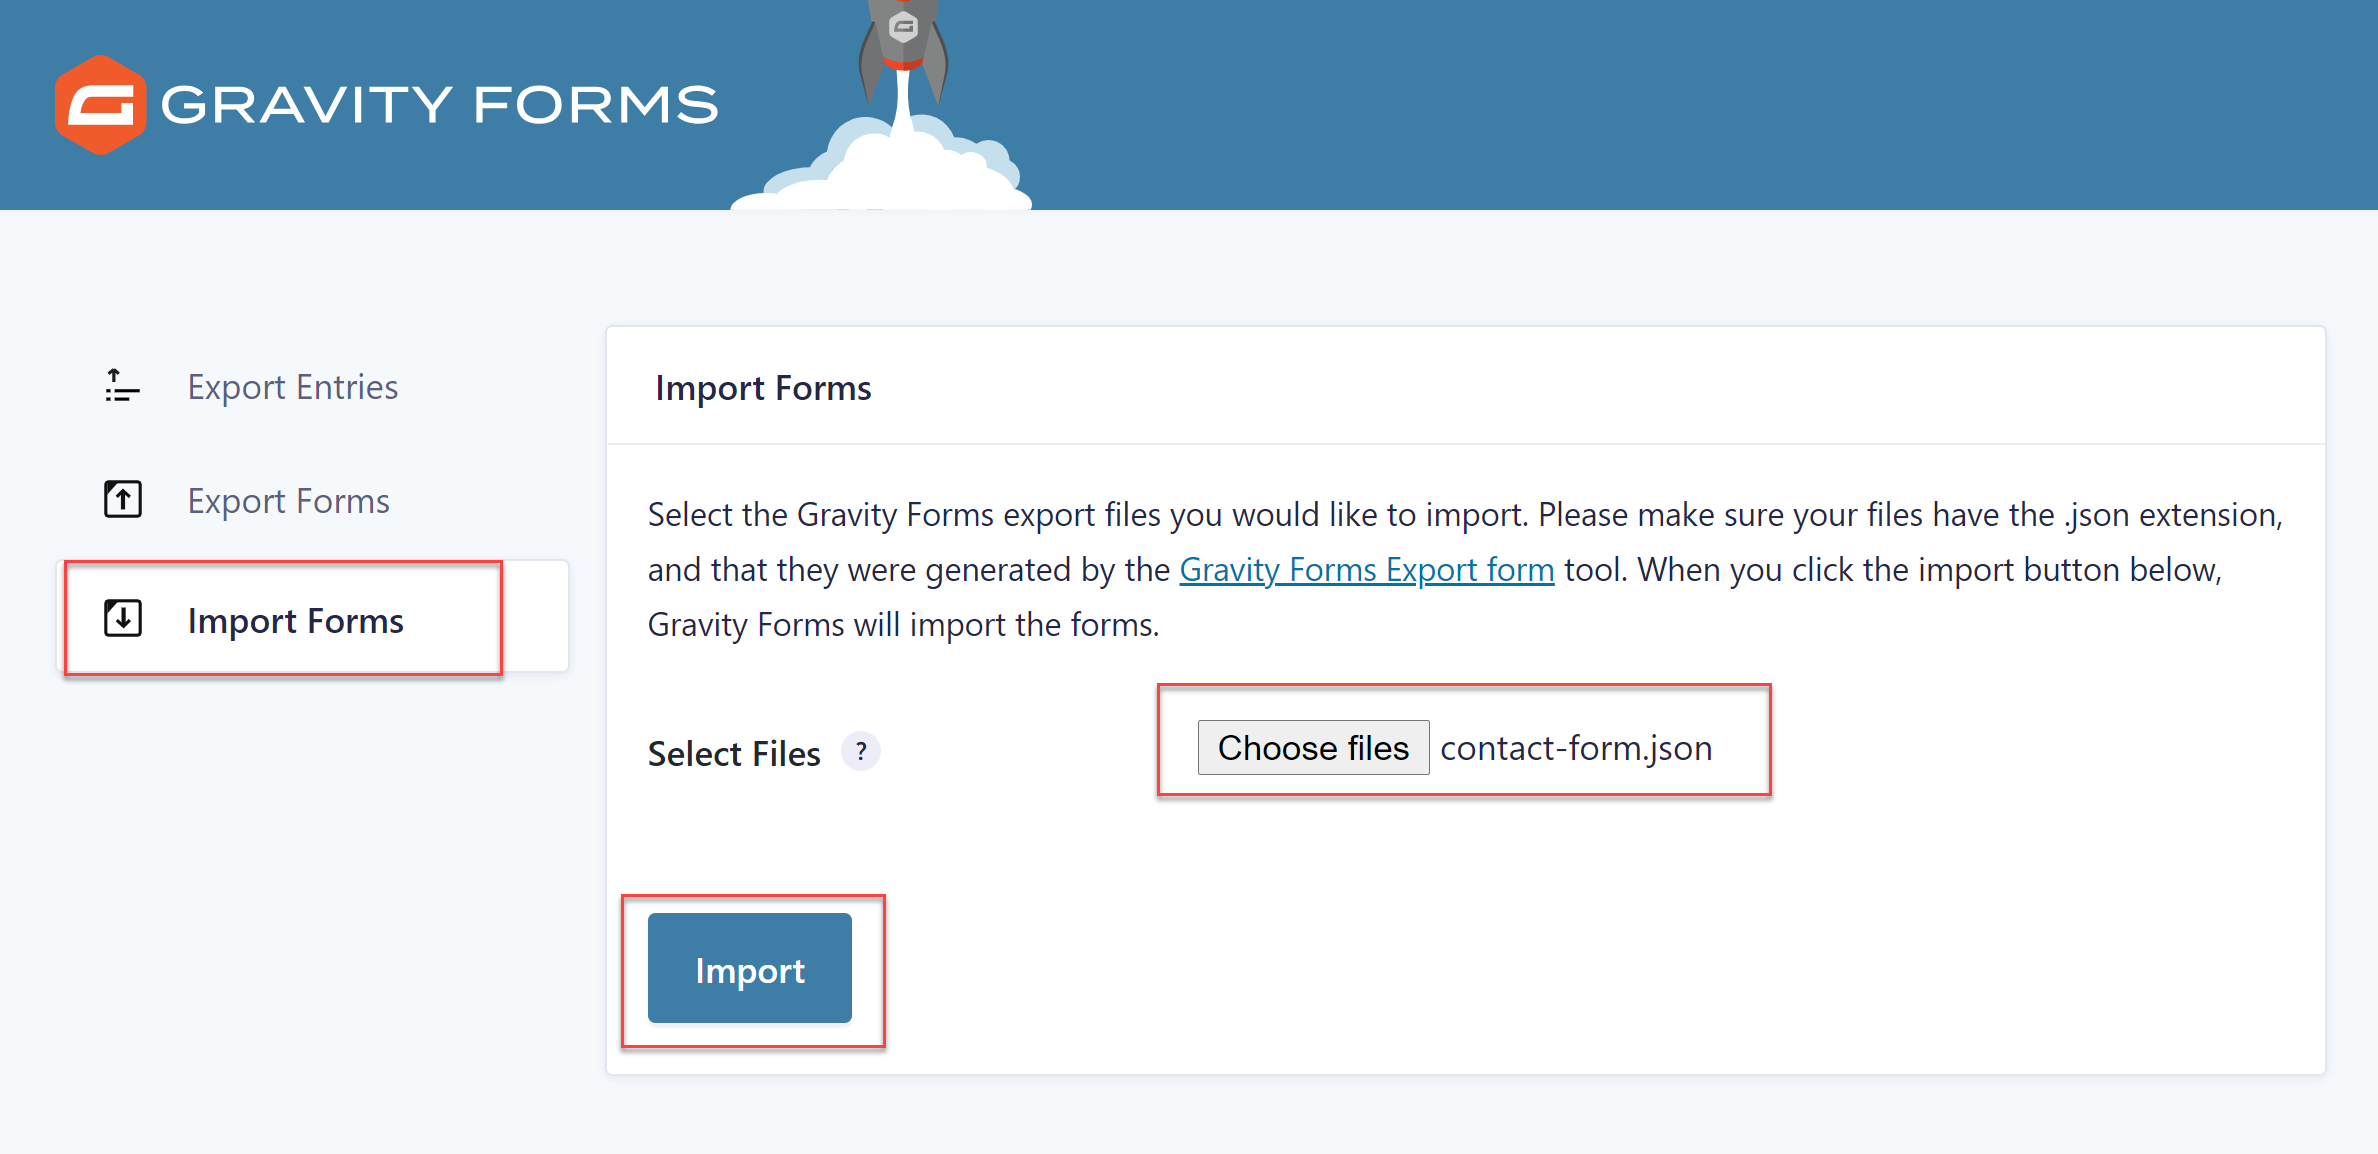
 The template will download in JSON format. You can then go to your WordPress dashboard and click on Forms > Import/Export > Import Forms. Locate the form template and press Import.
 This will import the form onto your site and you can then proceed with the next step of editing and customizing the form.
Edit The Form
Once you’ve imported the form template, you can edit it to suit your requirements. You can add more fields, remove those that you don’t need, and customize any field settings. When you’re done, simply Update the form to save the changes.
 For more information on how to get started with your first form, check out this article – Starter Guide: How to Import and Customize a Basic Contact Form.
Install And Configure Any Necessary Add-Ons
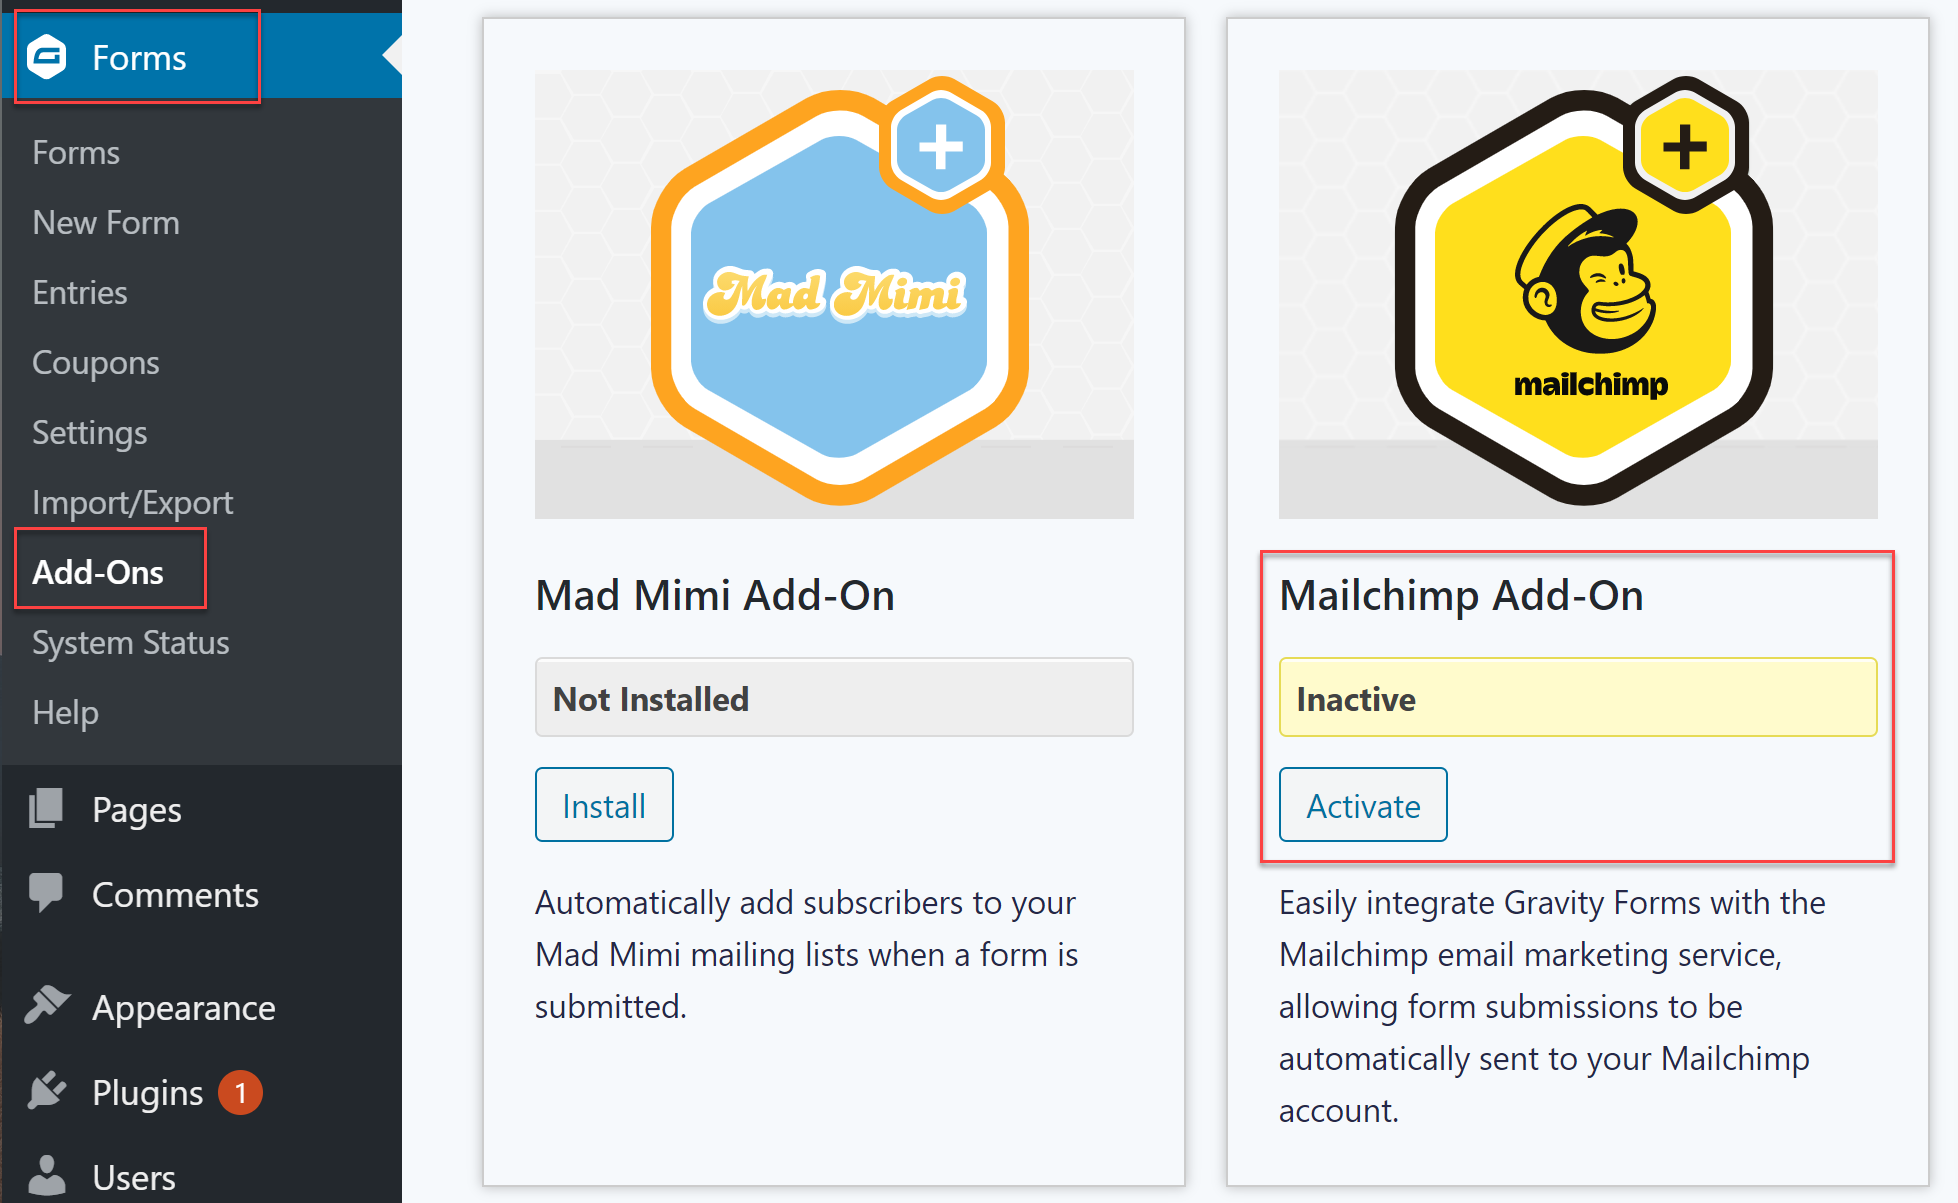
Lastly, consider installing an add-on or two to make your forms even smarter. For example, you could install an email marketing Add-On such as Mailchimp or HubSpot.
 Or, you could install the Zapier Add-On to automate admin tasks related to form submissions and sync your forms with thousands of other applications.
If you need more information on how to get started with Gravity Forms, we have a tutorial that walks you through all of the necessary steps.
How To Embed A Form In Your WordPress Website
Now that you know how to get started with Gravity Forms, let’s find out how to embed a form in your WordPress website. There are several methods for doing this and we’ll go over each one below.
Embedding A Form Using The Block Editor
If you’re using the new block editor in WordPress which was released with WordPress 5.0, you’ll need to use the Gravity Forms block to add a form to your page or post.
Start by navigating to the page where you want to add the form created with Gravity Forms. Go to Pages > All Pages and select the Edit option.
Then, click the Plus sign in the block editor and search for Gravity Forms. Under Embeds, click on Form. This will insert the Gravity Forms block.
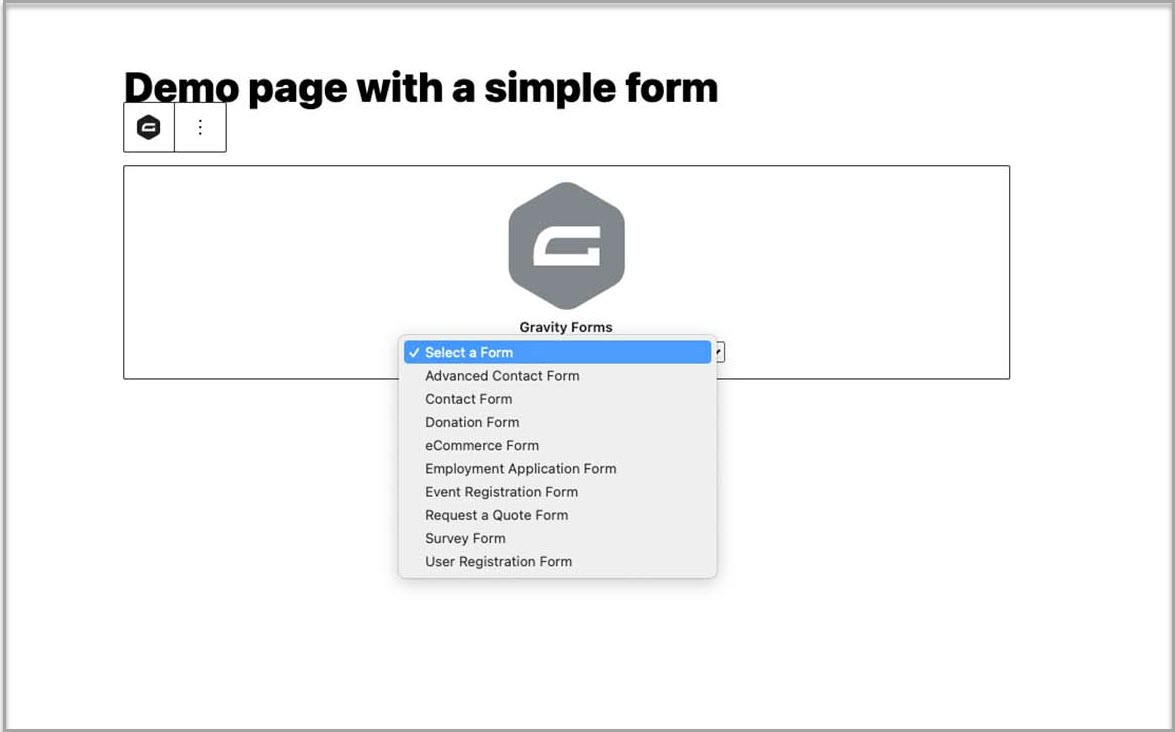 Then, select the correct form from the drop-down menu. This will insert that form onto the page.
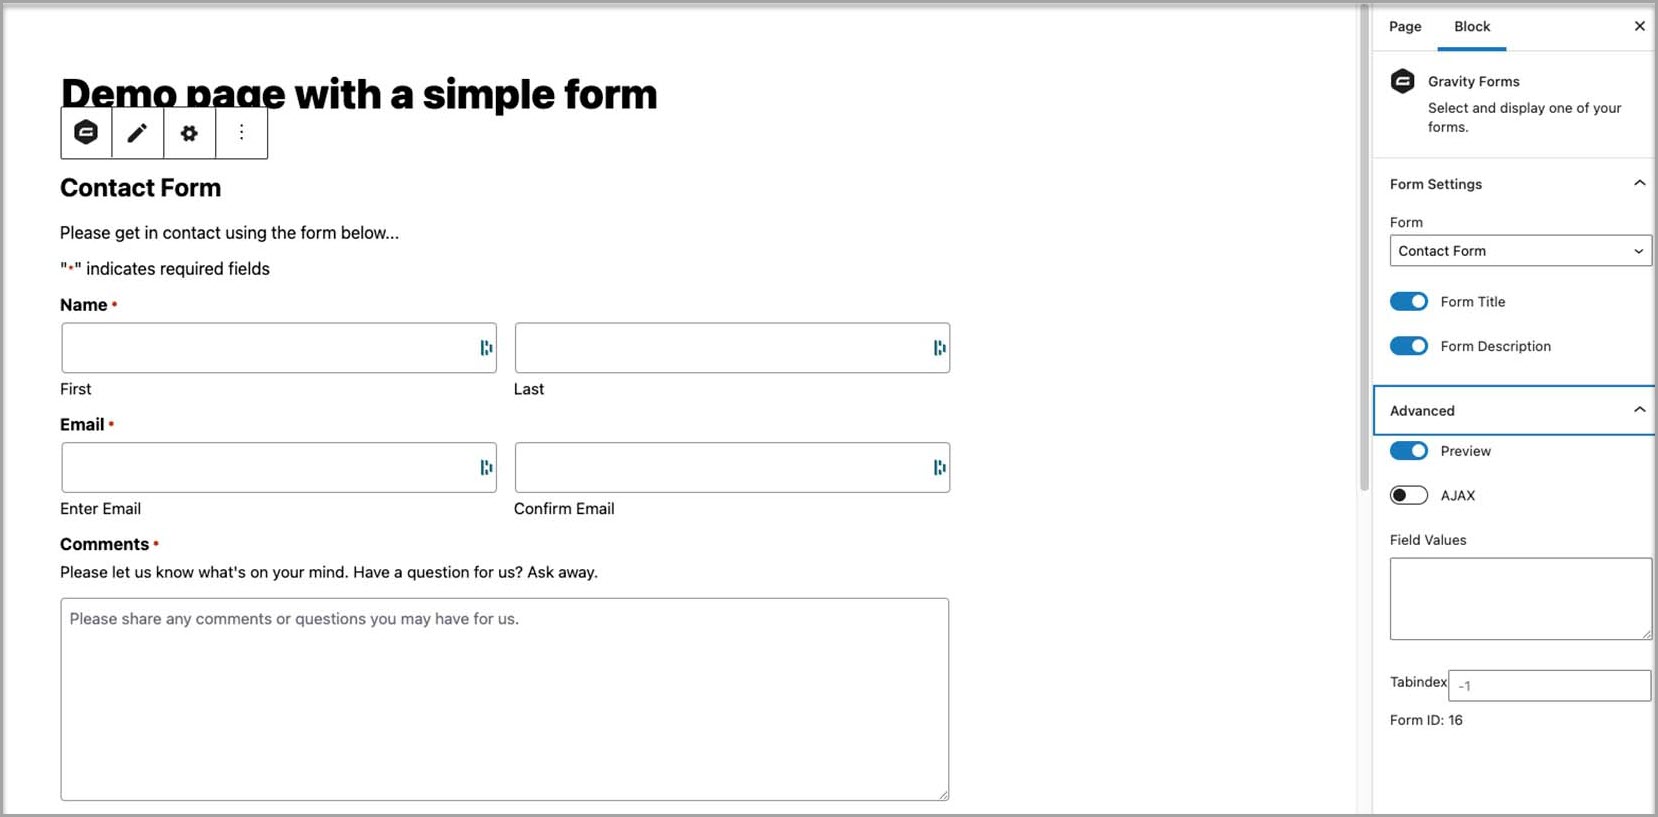 If needed, you can use the Block Options to control how the form appears on your site. A few options include:
- Toggling the title of the form on or off
- Toggling the description of the form on or off
- Embedding the form on the front-end using AJAX, so confirmations and changes between form pages can happen without page reloads
When you’re done going through these options, save your changes and then view your page to see the form in action.
You can use the same process to add a form to any other page on your site or even a blog post if you want to use Gravity Forms to collect leads for your email list.
Embedding A Form Using The Classic Editor
If you’re still using WordPress 4.9 or lower – or if you’ve upgraded to WordPress 5.0 and above but you’re still using the Classic Editor instead of the new block editor – you can still easily embed Gravity Forms into your posts and pages.
You’ll start by selecting the page where you want your form to appear. When the page or post editor loads, click on the Add Form button on the Upload/Insert toolbar.
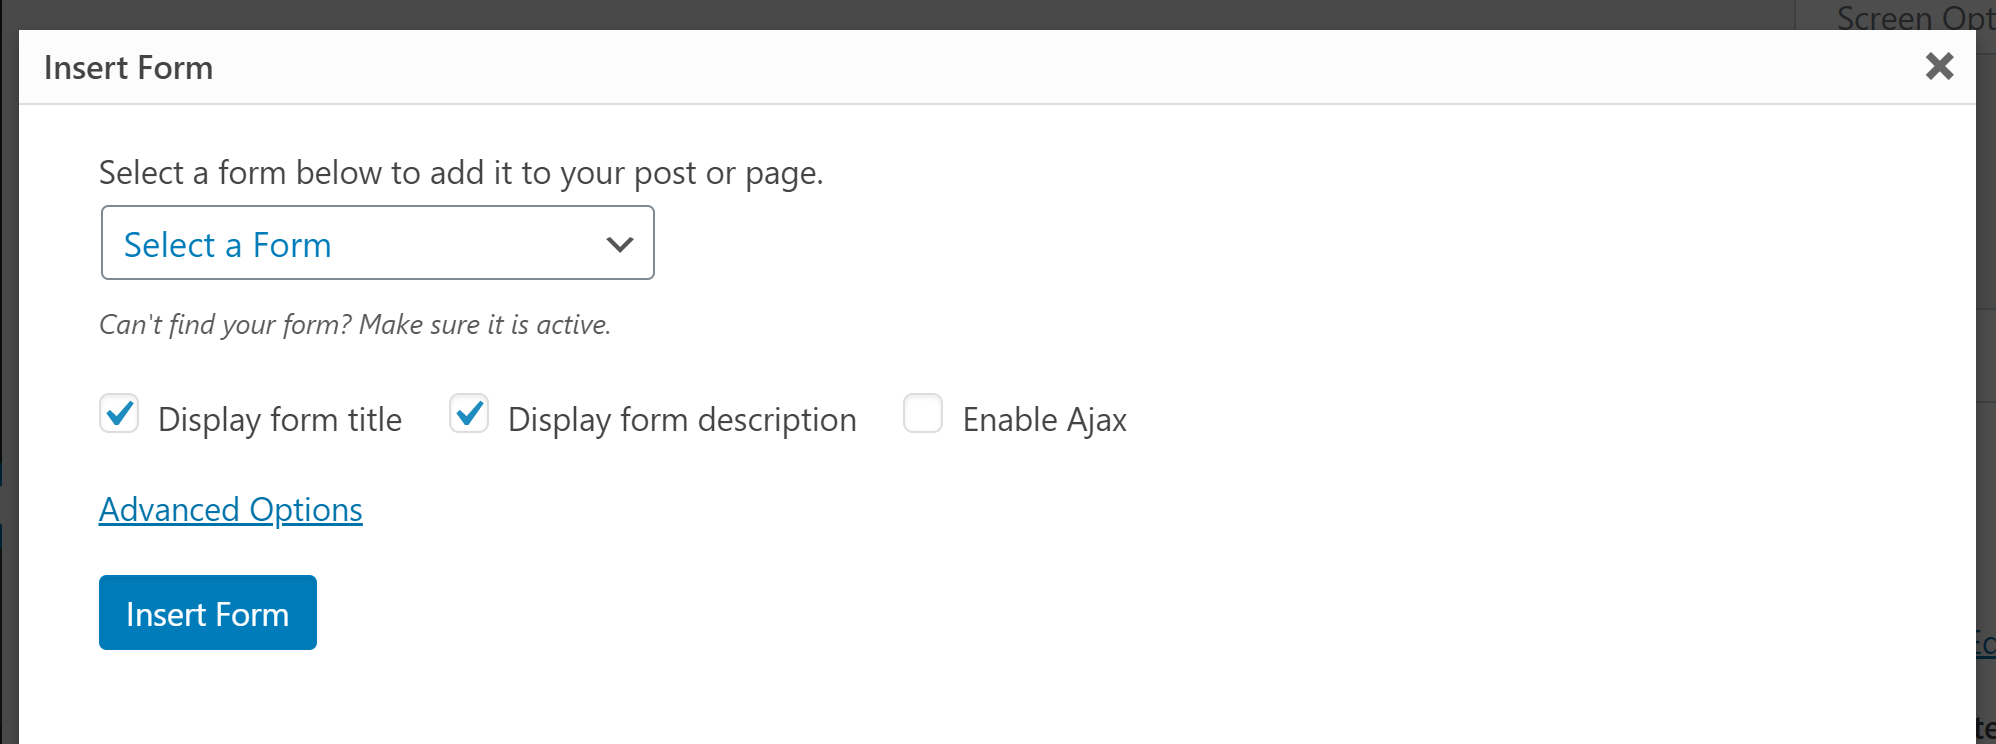 A new modal window will appear where you’ll be able to choose the correct form from the drop-down menu. Similarly to the block editor, you’ll have a few options here to configure how the form displays on the front-end of your site.
When you’re happy with the changes, click the Insert Form button to automatically insert the Gravity Forms shortcode into the page or post. Save the changes and you’ll then be able to view the page with the embedded form.
Using Theme File Or Hooks To Embed a Form
The last option is to embed a form using theme files or hooks. This option is useful if you’re a designer or a developer and want more advanced control over how a form displays.
To do this, you’ll need to use a function call within your WordPress theme file. The function and its available parameters are outlined below.
gravity_form( $id_or_title, $display_title = true, $display_description = true, $display_inactive = false, $field_values = null, $ajax = false, $tabindex, $echo = true );
One important thing to note if you decide to use this method, is that you must also manually include the necessary Gravity Forms related Javascript and CSS files. You can do this using the built in WordPress enqueue capabilities.
Those files are not included by default when you’re embedding a form via a function call. However, they are necessary for forms that make use of the conditional logic or use the date picker field.
As such, it’s strongly recommended that you enqueue those scripts to ensure your forms work properly. This will also prevent Gravity Forms from including them on the page if they’re already present.
To enqueue the necessary JavaScript and CSS files, you can use the gravity_form_enqueue_scripts function which looks like this:
gravity_form_enqueue_scripts( $form_id, $is_ajax );
You should add this function within your theme’s header.php file just before the wp_head() function is called.
For more information on the different options for embedding a form in WordPress, check out these resources…
Ready To Add Forms To Your WordPress Website With Gravity Forms?
As you can see, embedding forms in a WordPress website couldn’t be easier with Gravity Forms. Here are a few more resources that will help you get the most out of your Gravity Forms license:
If you still don’t have your Gravity Forms license, don’t worry. Start by signing up for a free personalized Gravity Forms demo and explore all the features that make our plugin a favorite with WordPress website owners worldwide.
Any questions about Gravity Forms? Drop them in the comments below, we can’t wait to hear from you!

If you want to keep up-to-date with what’s happening on the blog sign up for the Gravity Forms newsletter!